Showing posts with label tips. Show all posts
Showing posts with label tips. Show all posts
Friday, November 7, 2014
15 Tips to Increase Blog Traffic
The blogosphere is a big and busy world with over 100 million blogs and growing. How do you attract visitors to your blog? Follow these simple tips to drive traffic to your blog.
1. Write Well and Write Often
Frequently updating your blog with useful content is the first step to building your blogs audience. The content you write is what will keep readers coming back for more. Make sure you have something meaningful to say to them and say it often to maintain their interest and keep them loyal.
Furthermore, post frequently to increase the number of chances you have for your blogs content to be noticed by search engines such as Google or Technorati.
2. Submit Your Blog to Search Engines
Get on the radar screen for the popular search engines such as Google and Yahoo! bysubmitting your blogs URL to them. Most search engines provide a Submit link (or something similar) to notify the search engine of your new blog, so those search engines will crawl it and include your pages in their results.
Its important to understand that simply submitting your blog to search engines doesnt mean your pages will appear at the top of a Google search results screen, but at least your blog will be included and will have the chance of being picked up by a search engine.
3. Use and Update Your Blogroll
By adding links to sites you like in your blogroll, the owners of those blogs will find your blog and will be likely to add a reciprocal link in their blogrolls. Its an easy way to get the link to your blog in front of many readers on other blogs. The hope is that some of those readers will click on the link to your blog on the other blogs blogrolls and find your content interesting and enjoyable turning them into loyal readers.
4. Harness the Power of Comments
Commenting is a simple and essential tool to increase your blogs traffic. First, respond to comments left on your blog to show your readers that you value their opinions and draw them into a two-way conversation. This will increase reader loyalty.
Second, leave comments on other blogs to drive new traffic. Make sure you leave your blogsURL in your comment, so you create a link back to your own blog. Many people will read the comments left on a blog post. If they read a particularly interesting comment, they are highly likely to click on the link to visit the commentors website. Its important to make sure you leave meaningful comments that are likely to invite people to click on your link to read more.
5. Syndicate Your Blogs Content with an RSS Feed
Setting up an RSS feed button on your blog makes it easy for your loyal readers to not just read your blog but also know when you publish new content.
6. Use Links and Trackbacks
Links are one of the most powerful parts of your blog. Not only are links noticed by search engines, but they also act as a tap on the shoulder to other bloggers who can easily identify who is linking to their sites. Linking helps to get you noticed by other bloggers who are likely to investigate the sites that are linking to them. This may lead them to become new readers of your blog or to add links to your blog from theirs.
You can take links to other blogs a step further by leaving a trackback on the other blog to let them know youve linked to them. Blogs that allow trackbacks will include a link back to your blog in the comments section of the post that you originally linked to. People do click on trackback links!
7. Tag Your Posts
It takes a few extra seconds to add tags to each of your blog posts, but its worth the time in terms of the additional traffic tags can drive to your blog. Tags (like links) are easily noticed by search engines. Theyre also key to helping readers find your blog when they perform searches on popular blog search engines such as Technorati.
8. Submit Your Posts to Social Bookmarking Sites
Taking the time to submit your best posts to social bookmarking sites such as Digg,StumbleUpon, Reddit and more can be a simple way to quickly boost traffic to your blog.
9. Remember Search Engine Optimization
When you write your blog posts and pages, remember to optimize your pages for search engines to find them. Include relevant keywords and links but dont overload your posts with too many relevant keywords or completely irrelevant keywords. Doing so can be considered spamming and could have negative results such as your blog being removed from Googles search entirely.
10. Dont Forget Images
Images dont just make your blog look pretty, they also help people find you in search engine listings. People often use the image search options offered by Google, Yahoo! and other search engines, and naming your images with search engine optimization in mind can easily boost your traffic.
11. Consider Guest Blogging
Guest blogging can be done when you write a guest post on another bloggers blog or when another blogger writes a guest post on your blog. Both methods are likely to increase traffic as your blog will be exposed to the other bloggers audience. Many of the other bloggers readers will visit your blog to see what you have to say.
12. Join Forums, Web Rings or Online Groups
Find online forums, web rings, groups or social networking sites such as Facebook andLinkedIn where you can share ideas and ask questions of like-minded individuals. Add a link to your blog in your signature line or profile, so each time you post on a forum or participate in another online network, youre indirectly promoting your blog. Chances are many people will click on that link to learn more about you.
13. Promote Outside Your Blog
Promoting your blog shouldnt stop when you step outside the blogosphere. Add your blogs URL to your email signature and business cards. Talk about it in offline conversations. Its important to get your name and your blogs URL noticed offline, too.
14. Nominate Yourself and Other Blogs for Blog Awards
There are a number of blog awards given out throughout the year. Nominating yourself and other blogs and bloggers can draw attention to your blog and drive traffic to it.
15. Dont Be Shy
The most important part of the blogosphere is its community and much of your success as a blogger will be tied to your willingness to network with that community. Dont be afraid to ask questions, join conversations or just say hi and introduce yourself. Dont sit back and hope the online world will find you. Speak out and get yourself noticed. Let the blogosphere know youve arrived and have something to say!

Thursday, November 6, 2014
Tips To Optimize Your Blog For Better SEO
Search Engine Optimization uses a combination of techniques, tools, and technical know-how to get results. Search engine optimization (SEO) is a set of methodologies aimed at improving the visibility of a website in search engine listing. Search Engine Optimization (SEO) involves the careful optimization of corporate web sites to effectively increase their visibility in the major search engines such as Google, Yahoo, Alta-Vista,and many others. The higher a Web site ranks in the results of a search, the greater the chance that that site will be visited by a user. The higher a Web site ranks in the results of a search, the greater the chance that that site will be visited by a user.
Optimize the below three for better SEO:
- Meta Tags
- Navigational links
- Rich Content
Meta Tags:Meta Tags are very important for your websites visibility. Many search engines read them from your site when you submit it to them .Major meta tags that you can use:
Meta Title,
The only resource type that is currently in use is "document" This is the only tag that you need to put in for indexing purposes.
Meta Description,
Depending on the search engine, this will be displayed along with the title of your page in an index. "content" could be a word, sentence or even paragraph to describe your page. Keep this reasonably short, concise and to the point.
Meta Keyword,
It is important to choose the best keyword to get on top of google. You can check our article on "Blogging Tools For Keyword Research" for some best online tool to get the top keywords for your articles.Navigational links: At the right or at the bottom, but not on the left, of the page. When the search engines "read" your site, they read from the top left to the bottom right. Search engines place an emphasis on the first 100 words or text on the site. You do not want these words to be navigational links or Javascript. Ideally, you want to have your heading tags with your keywords in the beginning of your page. This being said, placing your links/JavaScript on the right or bottom of your page ensures the search engine spiders get to the text first, giving more weight to whats important on your page.
Rich Content: The more content you have on your site the more likely someone is to find what theyre looking for when they get there. Keep your site very content rich. Have a lot of pages.Update the site even twice a day if you have the time. Updating your site does not mean that you copy paste content from other sites.That will only push your rankings further down. Dont have any duplicate content. At the same time ,dont spam multiple content across the same website. When a search engine views or reviews a website, which they do at least every few months, it looks for specific characteristics found in the content of website landing pages.
Wednesday, October 15, 2014
LG L3 L90 Tips and Tricks How Tos
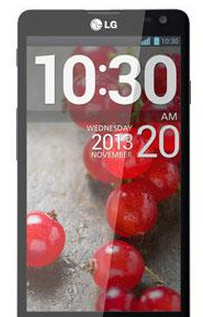
Here are some How Tos for your LG L3 L90. These How Tos are still not yet complete and I am still working on the others:
How to Factory Reset LG L3 L90
Resetting your LG L3 L90 will restore the default settings of your device. It will also delete all your files on your phone, so it is recommended to backup all your important files on your computer.
Luckily in L3 L90, you can backup your data through your phone on privacy settings before wiping all the data on your phone. But if you want to erase all the content on your phone, then there’s no need for you to backup your data.
To backup your data:
You can only backup app data, Wi-Fi passwords, and other settings to Google servers.
Step 1. Tap on the Home Icon > Three Horizontal Lines or Settings.
Step 2. Select System settings > Backup & reset.
Step 3. Double check if the Backup account is correct.
Step 4. Then tap Back up my data. (A blue checkmark will appear.)
Step 5. If you want to set to the automatic restore backups, tap Automatic restore. (A blue checkmark will appear.)
To Factory Reset Your L3 L90:
Step 1. Tap on the Home Icon > Three Horizontal Lines or Settings.
Step 2. Select System settings > Backup & reset.
Step 3. If you want to proceed in restoring the factory settings, tap Factory data reset.
Step 4. Then tap Reset phone.
Step 5. Enter the unlock sequence if you have, then tap Erase everything to confirm.
How To Make Your L3 L90 a WiFi Hotspot
Do you want to share your Internet connection for your friends? With LG L3 L90, you can now share your connection with up to 5-8 devices by turning on the portable Wi-Fi hotspot. You will notice an icon in the Status bar when your phone is sharing a data connection.
Follow these steps on how to make your L3 L90 a WiFi hotspot:
Step 1. Tap on the Home Icon > Three Horizontal Lines or Settings.
Step 2. Select System settings > Tap More.
Step 1. Tap on the Home Icon > Three Horizontal Lines or Settings.
Step 2. Select System settings > Tap More.
Step 3. Then choose Portable WiFi hotspot to activate. (A blue check mark will appear). Your phone should start the broadcasting with its WiFi network name (SSID) so it can connect to other devices.
If you want to change the network name or put a password, tap on Configure WiFi hotspot.
Tap on Network SSID field and enter your preferred name.
Tap on Network SSID field and enter your preferred name.
It is also recommended to put a password so others cant connect without your permission. Tap the Security menu and select WPAP2 PSK (WiFi Protected Access 2 with a Pre-shared Key.). When a password field is added to the dialog box, enter a password. Every time theres a person you will attempt to connect to your Portable WiFi, he/she will need to enter the password.
The SSID Visibility if you want your hotspot to be displayed or not on other devices.
If you want to limit the number of users on your hotspot, tap on Max Users and select the number of phones you want.
Then dont forget to Save the changes you made.
How to Add Applications to the HomeLcd on LG L3 L90
How to Add Applications to the HomeLcd on LG L3 L90
By adding applications on your homeLcd, youre creating a hassle-free phone experience. Important apps or apps that you usually open are accessible if you put it right on your homeLcd instead of going thru lot of tapping and clicking. Now heres how you can add applications that you use most often on your LG L3 L90 smartphone.
1. First you need to tap on .
.
2. Then tap on .
.
3. From there, touch and hold the application you wish to be added to your homeLcd.
4. And lift your finger to place the app on the homeLcd or you can drag the app icon to where you want it on the Lcd and then lift your finger.
Thats it! Youve just customized your homeLcd by adding your must-have apps.
How to Turn On Wi-Fi Direct on LG L3 L90
1. First you need to tap on
.2. Then tap on
.3. From there, touch and hold the application you wish to be added to your homeLcd.
4. And lift your finger to place the app on the homeLcd or you can drag the app icon to where you want it on the Lcd and then lift your finger.
Thats it! Youve just customized your homeLcd by adding your must-have apps.
How to Turn On Wi-Fi Direct on LG L3 L90
In case you dont know what is the use of the Wi-Fi Direct, Wi-Fi Direct will let your device connect directly to other devices that is also Wi-Fi enabled without an access point. You can directly transfer data between the devices connected to each other with reduced setup. Since the Wi-Fi Direct may consume a high battery usage, so it is recommended that you plug your phone into a power outlet while using it.
To turn On your Wi-Fi Direct:
How to Add and Forget a Wi-Fi Network on LG L3 L90To turn On your Wi-Fi Direct:
- Tap on the Home icon, then the Three Horizontal Line or Settings.
- Select System Settings, then More.
- Tap on Wi-Fi Direct. (A blue check will appear once activated.)
- If you want to create a group, then tap Create Group.
- If you want to search more devices, then tap Search.
The steps below will let you show how to add a wi-fi network manually whenever youre out of range or the network itself wont show its SSID. However, if you want to connect to a secured network, you may need to obtain the networks password. Heres how to add a wi-fi network on LG L3 L90.
1. First, you need to turn on WiFi if its not already on.
2. On WiFi settings, tap on Add Network.
3. Then type in the networks name or the SSID. If its a secured network, tap the Secured drop down menu and tap the type of security used in the network.
4. Type in the password or security credentials of the secured network.
5. Tap on Save.
Since you have just saved a password, youre device will automatically connect to the network when you come in range. But if you dont want your phone to connect automatically or if the network is no longer in use, you can do the following steps below:
1.Turn on WiFi.
2. Go to WiFi settings and tap and hold the name of network.
3. And tap on Forget Network.
How to Extend Battery Life of LG L3 L90
Battery Life depends on how you use your device. For LG L3 L90 device, if you want to save your battery to last longer hours, you may need to adjust your settings. Follow these suggestions:
• Turn on the power-saving option on the device.
- To turn on the Power saving mode. Tap on the Home icon > then the 3-Horizontal line or Settings > System settings > Powersaver and drag the switch to the “ON” position.
• Lessen the Lcd brightness and the Lcd lock timeout.
• Turn down your device volume with the volume keys.
• Close any apps or features when you are done using it so they will not continuously running in the background.
• Turn off the network connection if you are out of range so that your device will stop searching for a network signal.
• You should use the latest version of the software update. Software updates improves some features and fixes some bugs on the previous software version.
• Turn off the camera flash.
• The camera viewfinder can be a power drain, so after youve finished taking photos.
Monday, October 13, 2014
Sony Xperia M Tips and Tricks How Tos
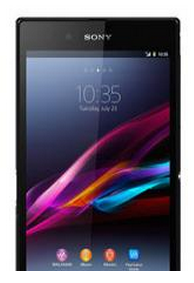
Here are some How Tos for your Sony Xperia M. These How Tos are still not yet complete and I am still working on the others:
How to Factory Reset Sony Xperia M
We have our own reasons why we factory reset our device. Maybe we want to delete all the files and restore the device to its original state. It could also be the device may be malfunctioning or so slow and it needs to be reset.
Restoring the default settings or factory reset your Sony Xperia M will delete all your files. It is recommended to backup your important files on your computer before attempting to reset your device.
There are two ways on how to reset your Sony Xperia M. One is to erase everything, wiping your files and restoring the default settings. The other one is to reset the device without deleting your personal data.
How To Reset Your Sony Xperia (Erasing All Your Files):
- On your Home Lcd, tap Apps.
- Go to Settings, and select Backup & reset.
- Tap on Factory data reset.
- Then Reset phone.
- Confirm by tapping Erase everything. You just need to wait while your phone deleting your files and restoring your settings to default.
How To Reset Without Erasing Your Personal Data:
- On your Home Lcd, tap Apps.
- Go to Settings, and select Backup & reset.
- Tap on Settings reset.
- Then Reset phone.
- Confirm by tapping Reset settings.
- Wait while your phone restoring your settings.
How to Set Up Voicemail Service on Sony Xperia M
Voicemail services depends on your subscription plan with your service provider. This feature allows caller to leave voice messages on your phone whenever you cant pick up. Your voicemail number may be found on your sim card or you can get it directly from your service provider. Here are the steps to set up voicemail service on Sony Xperia M.
To set up your voicemail number:
1. On your devices homeLcd, tap on Menu icon to enter your voicemail number.
2. Go to Settings menu.
3. Select Call Settings and choose Voicemail Settings.
4. Tap on Voicemail number so you can enter your designated voicemail service number.
5. And lastly tap on OK.
To call your voicemail service number:
1. On your homeLcd, tap on the Menu icon.
2.Look for Phone and tap it.
3. And touch and hold for seconds the number 1.
Voicemail services depends on your subscription plan with your service provider. This feature allows caller to leave voice messages on your phone whenever you cant pick up. Your voicemail number may be found on your sim card or you can get it directly from your service provider. Here are the steps to set up voicemail service on Sony Xperia M.
To set up your voicemail number:
1. On your devices homeLcd, tap on Menu icon
to enter your voicemail number.2. Go to Settings menu.
3. Select Call Settings and choose Voicemail Settings.
4. Tap on Voicemail number so you can enter your designated voicemail service number.
5. And lastly tap on OK.
To call your voicemail service number:
1. On your homeLcd, tap on the Menu icon
.2.Look for Phone and tap it.
3. And touch and hold for seconds the number 1.
Battery Life depends on how you use your device. For your Sony Xperia M device, if you want to save your battery to last longer hours, you may need to adjust your settings. Follow these suggestions:
• Turn on the power-saving option on the device. Then lessen the Lcd brightness and the Lcd lock timeout. On the HomeLcd, tap on Menu icon. Select Settings > Power management.
- Use the Stamina mode and Low battery mode features.
- To activate the STAMINA mode: While you are in the Power management, tap on Point icon next to STAMINA mode, then tap Activate.
• Turn down your device volume with the volume keys.
• Close any apps or features when you are done using it so they will not continuously running in the background.
• Turn off the network connection if you are out of range so that your device will stop searching for a network signal. To turn off the network go to Settings and turn off the Bluetooth and Wi-Fi.
• You should use the latest version of the software update. Software updates improves some features and fixes some bugs on the previous software version.
• Adjust your brightness level to low.
• Turn off the camera flash.
• If you have any live wallpaper, Disable it.
• Set the synchronization application to manual. You can also choose the automatic, but increase the synchronization intervals.
• If you want to listen to music, use the Sony original hands free device. It demand less battery power than your devices own loudspeakers.
Wouldnt it be nice if youre phone automatically plays your song list right when you step in your car? Or what about letting you show your whole day agenda the moment you arrive at your work table between 8-9am? These are just examples on how Sony Xperia Ms Smart Connect app works. With this app, you can set an event to happen on your device at certain times or what will happen when you connect/disconnect accessories like headset or charger. Hereshow to use it.
1. On your devices home Lcd, tap on Menu icon
2. Look for Smart Connect and tap on it.
3. If its your first time opening the said app, tap on OK to close the introduction Lcd.
4. Go to Events tab and tap on the plus (+) icon.
5. Type in a name for the event and tap on Create.
6. Under When, add either an accessory ( like what happens on your device when you connect your headset) or a time interval or could be both.
7. Under Do This, add what you want to happen on your device.
8. Under At the End, add what you want to happen to your device when you disconnect your accessory or when the time interval ends.
9. Press on Back Arrow
 to save the event.
Transferring files in Sony Xperia M is now made easy by using the Media Transfer Mode. You can easily transfer files between your device and other MTP compatible devices such as computer, using a Wi-Fi connection. But before you can transfer files wirelessly, you will need to pair both devices.
Note: You will need a Wi-Fi enabled devices that supports Media transfer such as a computer running Microsoft, Windows Vista orWindows 7.
To pair your device with the computer:
- Check if the media transfer mode of your device is enabled. It is normally enabled by default.
- Using the USB cable, connect your device to a computer.
- On your computer, once the name of your device appear, click on Network Configuration and just follow the steps on how to pair the computer.
- After pairing, safely disconnect your device from your computer.
These steps will work only on Windows 7 OS and the computer is connected to the Wi-Fi Access point via network cable.
To connect paired devices wirelessly in Media Transfer Mode:
- First things first, check if the media transfer mode is enabled.
- On your Home Lcd, tap on the Menu icon.
- Select Settings > Xperia > USB connectivity.
- Then tap the paired device that you want to connect to under Trusted devices.
- Tap connect.
If you want to disconnect, just tap on the paired device and tap Disconnect.
If you want to remove the paired device, tap on the paired device you want to remove and select Forget.
How to Add a Shortcut on Sony Xperia M HomeLcd
Just like a desktop, it also works best on any smartphones to add a shortcut on a homeLcd. This r somehow makes navigation, especially to important files/apps, more accessible. Its less hassle and less tapping. Sony Xperia M definitely allows you to make your device experience stress-free by adding a shortcut to important apps on your homeLcd. Heres how to do it.
1. On your devices homeLcd, touch and hold and empty area until the device vibrates.
2. After doing so, tap on Apps.
3. Then go to Shortcuts and select a shortcut.
4. Or another option, just go directly to the Application Lcd and touch and hold the application.
Adding Widgets on your HomeLcd will help you improve your productivity in using your Sony Xperia M. If you dont know what widgets means, Widgets are small applications that you can directly use on your HomeLcd. These will serve as your shortcut icon so will no longer need to access your Menu.
Follow these steps on how to add widgets on your HomeLcd.
- Tap and hold an empty area on your Home Lcd until your device vibrates.
- There should an option appear, tap on Widgets.
- Select the widget and tap on it you want to add.
- There are some widgets that are resizeable, you can expand them to view the content more on your HomeLcd.
How to resize a Widget:
- Tap and hold the widget you want to resize until it magnifies and the device vibrates. You can tell if the widget is resizeable if the highlighted frame and resizing dots appear.
- You just need to Drag the dots for your preferred size.
- Then tap anywhere on the HomeLcd to confirm the new size of the widget.
How to Change Time & Date on Sony Xperia M
In some devices you can only change the Timezone and not the specific time and date. But in Sony Xperia M, you have an option whether to set the time in automatic or to manually set the time.
Follow these steps on how to change the time and date on your device:
To manually set the date:
- On your Home Lcd, tap the Menu icon.
- Select Settings, then tap Date & Time.
- You need to uncheck the Automatic date & time. If it is set to automatic.
- Then tap on Set date, and adjust the date by scrolling up and down.
- To confirm the changes, tap Done.
To manually set the time:
- On your Home Lcd, tap the Menu icon.
- Select Settings, then tap Date & Time.
- You need to uncheck the Automatic date & time. If it is set to automatic.
- Then tap on Set time, and adjust the time by scrolling up and down.
- To confirm the changes, tap Done.
If you want to change the timezone:
- On your Home Lcd, tap the Menu icon.
- Select Settings, then tap Date & Time.
- You need to uncheck the Automatic date & time. If it is set to automatic.
- Then tap on Select time zone.
- Find your preferred time zone in the option.
Duplicate contacts usually happens when you import your old contacts to your new device or when you synchronize your contacts with the other account. On your Sony Xperia M, you can avoid dupicate contacts and instead link these two to create a single entry. If you happen to link two contacts by mistake, you can separate them again. Heres how you can link two contacts.
1. On your devices homeLcd, tap on
 .
.2. Tap on
 and tap the contact you want to link with another contact.
3. Press on
 and tap Link contact.
4. And tap the contact whose information you want to be linked with the first one. Tap OK to confirm. The first contact no longer appears on your contact list but is merged with the second contact.
Now if you mistakenly linked two contacts
on your homeLcd and then tap on.2. Then tap on the linked contact you want to edit.
3. And tap on
 . Tap on Unlink contact on the list and tap on OK to confirm.
How to Transfer Contacts from Sim Card or Memory Card to Sony Xperia M
Contacts is very important for everyone of us. We cant connect to our friends without a contact number. If you have a new phone, saving contacts on the phone one by one is so hassle. But if you have save your contacts on a Sim Card or Memory Card, then you can transfer your contacts from your SIM Card or Memory Card to your Sony Xperia M.
How to transfer contacts from a SIM card to your Xperia M:
- On your devices homeLcd, tap on the Menu icon .
- Then tap on the Person icon or Contacts.
- Press the Three Vertical Dots, and select Import contacts > SIM card.
- If you have set up a synchronization account, then you can choose to add the SIM card contacts under that account. Or you may choose to only use the contacts on your device.
- If you want to import all the contacts, tap Import all.
- If you want to select which contact to transfer, you just need to find and tap on the contact.
How to transfer contacts from a memory card to your Xperia M:
- On your devices homeLcd, tap on the Menu icon .
- Then tap on the Person icon or Contacts.
- Press the Three Vertical Dots, and select Import contacts > SD card.
- Choose the option you preferred if you have set up a synchronization account. Whether to add the imported contacts under that account or on your device.
- If you have more than one vCard file on the SD card, there should be a list appear on the different batches of contacts. Just select the batch you want to import.
How to Import Contacts From Old Phone to New Phone (on Sony, iPhone, Samsung, HTC and Nokia)
Contacts is very important for everyone of us. We cant connect to our friends without a contact number. If you have a new phone, saving contacts on the phone one by one is so hassle. But now, theres an easy way how to transfer or import your contacts from your old phone to your new phone.
Use your PC to transfer contacts to your new phone. This process is applicable in several phone brands, including iPhone, Samsung, HTC and Nokia.
You just need an Internet Connection on your PC, your old and new phone and their own USB cable.
If you are not prompted with a pop-up window to install the PC Companion, you can also download the PC Companion here.
How to Screen Mirror Sony Xperia M to Show the Screen on a TV
The Screen Mirroring will allow you to show the Lcd of your device on a TV or other large display without using a cable connections. It uses the Wi-Fi Direct technology that create a wireless connection between two devices. You can also use this feature to listen to music from your phone via the TVs speakers.
How to mirror the Lcd of your phone on a TV:
1. First you need to turn on the Lcd mirroring function on your TV. Just follow the instructions in the User Guide of your TV.
2. From your Home Lcd, tap on the Menu icon
3. Select on Settings, and tap Xperia™.
4. Choose Screen mirroring.
5. Tap to turn on the Screen mirroring and select a device.
Note: The TV that you want to connect with must support Lcd mirroring for the above described functionality to work. If it does not support, then you can try the Throw feature. Go to Settings > Throw feature.
How to Share Contacts Using NFC on Sony Xperia M
How to Add a Geotag on a Photo on Sony Xperia M
How to Hard Reset Sony Xperia M Using Buttons
We have our own reasons why we hard reset our device. Maybe we want to delete all the files and restore the device to its original state. It could also be the device may be malfunctioning or so slow and it needs to be reset.
Restoring the default settings or factory reset your Sony Xperia M will delete all your existing files. It is recommended to backup your important files on your computer before attempting to reset your device.
1. If your phone is turned off, just press and hold the Volume Up and Volume Down buttons.
2. Then press and release the Power button (just keep on holding the volume buttons). There should a menu will appear on your phone.
3. Press the Volume down button to navigate to the Recovery option. Press the Volume Up to select (if that doesnt work, use the Power button to select).
4. An Android logo will appear. Press the Volume Down and Volume Up button together and a recovery menu should appear. Use the Volume buttons to move to the Wipe data/Factory reset option and then press Power to select.
5. Use the Volume Down key to choose Yes and press the Power button again to select.
Use your PC to transfer contacts to your new phone. This process is applicable in several phone brands, including iPhone, Samsung, HTC and Nokia.
You just need an Internet Connection on your PC, your old and new phone and their own USB cable.
Then you need to install the PC Companion program. This is a free application and the installation files are already saved on your new phone. This program can also be used in updating your phone software.
Please note that if you are using the Microsoft Windows 7 operating system on your PC, make sure that the AutoPlay setting is enabled.
To check your settings:
Click Start > Control Panel, then type "autoplay" on the search box. Click the AutoPlay, and mark the check box Use AutoPlay for all media and devices.
Installing the PC Companion:
Installing the PC Companion:
- Turn on your new Phone and connect it to your PC.
- On your new Phone, tap "Install" to install PC Companion on the PC.
- On your computer, if a pop-up window that appears notifies you about available PC Software, select Run Startme.exe.
- Then click Install to start the installation and then follow the instructions to complete the installation.
If you are not prompted with a pop-up window to install the PC Companion, you can also download the PC Companion here.
Transferring your contacts to your new phone:
- Make sure that PC Companion is installed on your PC.
- Open the PC Companion application on your PC.
- Then click Contacts Setup and follow the instructions to transfer your contacts.
How to Screen Mirror Sony Xperia M to Show the Screen on a TV
The Screen Mirroring will allow you to show the Lcd of your device on a TV or other large display without using a cable connections. It uses the Wi-Fi Direct technology that create a wireless connection between two devices. You can also use this feature to listen to music from your phone via the TVs speakers.
How to mirror the Lcd of your phone on a TV:
1. First you need to turn on the Lcd mirroring function on your TV. Just follow the instructions in the User Guide of your TV.
2. From your Home Lcd, tap on the Menu icon
3. Select on Settings, and tap Xperia™.
4. Choose Screen mirroring.
5. Tap to turn on the Screen mirroring and select a device.
Note: The TV that you want to connect with must support Lcd mirroring for the above described functionality to work. If it does not support, then you can try the Throw feature. Go to Settings > Throw feature.
How to Share Contacts Using NFC on Sony Xperia M
NFC feature is a must-have for any smartphones these days. Near-field communication or NFC works similarly like bluetooth. By touching your NFC-enabled phones against each other, you can then share contacts, music and photos. Well, heres how you can easily share contacts on Sony Xperia M uisng NFC feature.
1. On your device, enable content sharing in Settings.
2. Then go to Wireless and Networks.
3 And choose on More menu.
When the phone vibrates, tap the onLcd message that says "touch to beam".
How to Add a Geotag on a Photo on Sony Xperia M
Adding a location to those photos somehow adds relevance and it gives you that flashback of memories when you view those nicely captured moments. Well, this feature is not new any longer since its been there online and you often use them on photo-filtered websites. But with Sony Xperia M, you can now add geotags on your photos right on your handset. Heres how you can add geotag on your photos.
1. Open your photo gallery on your device.
2. When youre viewing a photo, just tap the Lcd and the toolbars will display.
3. Now tap to open the map Lcd.
4. Find and tap the desired location to put the map on the photo.
5. To adjust the location of the photo, just tap the location on the map to where you want to move the photo.
6. Tap OK when youre done and to save the geotag. You can then return to the photo viewer Lcd.
1. Open your photo gallery on your device.
2. When youre viewing a photo, just tap the Lcd and the toolbars will display.
3. Now tap
to open the map Lcd.4. Find and tap the desired location to put the map on the photo.
5. To adjust the location of the photo, just tap the location on the map to where you want to move the photo.
6. Tap OK when youre done and to save the geotag. You can then return to the photo viewer Lcd.
How to Hard Reset Sony Xperia M Using Buttons
We have our own reasons why we hard reset our device. Maybe we want to delete all the files and restore the device to its original state. It could also be the device may be malfunctioning or so slow and it needs to be reset.
Restoring the default settings or factory reset your Sony Xperia M will delete all your existing files. It is recommended to backup your important files on your computer before attempting to reset your device.
1. If your phone is turned off, just press and hold the Volume Up and Volume Down buttons.
2. Then press and release the Power button (just keep on holding the volume buttons). There should a menu will appear on your phone.
3. Press the Volume down button to navigate to the Recovery option. Press the Volume Up to select (if that doesnt work, use the Power button to select).
4. An Android logo will appear. Press the Volume Down and Volume Up button together and a recovery menu should appear. Use the Volume buttons to move to the Wipe data/Factory reset option and then press Power to select.
5. Use the Volume Down key to choose Yes and press the Power button again to select.
Sunday, October 12, 2014
Sony Xperia Z2 Tablet Tips and Tricks How Tos
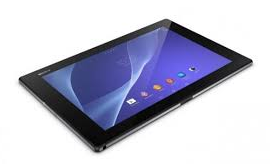
Here are some tricks for your Sony Xperia Z2 Tablet. Visit this site more often for updates and some tips. You can also submit your concern at our contact us form on the sidebar. If your device is not listed on this site and you are having problems with it. Dont hesitate to contact us, we will try to respond on your emails within 24-hours.
How to Factory Reset Sony Xperia Z2 Tablet
We have our own reasons why we factory reset our device. Maybe we want to delete all the files and restore the device to its original state. It could also be the device may be malfunctioning or so slow and it needs to be reset.
Restoring the default settings or factory reset your Sony Xperia Z2 tablet will delete all your files. It is recommended to backup your important files on your computer before attempting to reset your device.
There are two ways on how to reset your Sony Xperia Z2 tablet. One is to erase everything, wiping your files and restoring the default settings. The other one is to reset the device without deleting your personal data.
How To Reset Your Sony Xperia Z2 (Erasing All Your Files):
- On your Home Lcd, tap Apps icon.
- Go to Settings, and select Backup & reset.
- Tap on Factory data reset.
- Then Reset tablet.
- Confirm by tapping Erase everything. You just need to wait while your phone deleting your files and restoring your settings to default.
How To Reset Without Erasing Your Personal Data:
- On your Home Lcd, tap Apps icon.
- Go to Settings, and select Backup & reset.
- Tap on Settings reset.
- Then Reset tablet.
- Confirm by tapping Reset settings.
- Wait while your phone restoring your settings.
Warning: To avoid permanent damage to your device, do not restart your device while a reset procedure is underway.
How to Set Up Voicemail Service on Sony Xperia Z2 Tablet
Voicemail services depends on your subscription plan with your service provider. This feature allows caller to leave voice messages on your phone whenever you cant pick up. Your voicemail number may be found on your sim card or you can get it directly from your service provider. Here are the steps to set up voicemail service on Sony Xperia Z2 tablet.
To set up your voicemail number:
1. On your devices homeLcd, tap on Menu icon to enter your voicemail number.
2. Go to Settings menu.
3. Select Call Settings and choose Voicemail Settings.
4. Tap on Voicemail number so you can enter your designated voicemail service number.
5. And lastly tap on OK.
To call your voicemail service number:
1. On your homeLcd, tap on the Menu icon.
2.Look for Phone and tap it.
3. And touch and hold for seconds the number 1.
Voicemail services depends on your subscription plan with your service provider. This feature allows caller to leave voice messages on your phone whenever you cant pick up. Your voicemail number may be found on your sim card or you can get it directly from your service provider. Here are the steps to set up voicemail service on Sony Xperia Z2 tablet.
To set up your voicemail number:
1. On your devices homeLcd, tap on Menu icon
to enter your voicemail number.2. Go to Settings menu.
3. Select Call Settings and choose Voicemail Settings.
4. Tap on Voicemail number so you can enter your designated voicemail service number.
5. And lastly tap on OK.
To call your voicemail service number:
1. On your homeLcd, tap on the Menu icon
.2.Look for Phone and tap it.
3. And touch and hold for seconds the number 1.
Battery Life depends on how you use your device. For your Sony Xperia Z2 Tablet device, if you want to save your battery to last longer hours, you may need to adjust your settings. Follow these suggestions:
• Turn on the power-saving option on the device. Then lessen the Lcd brightness and the Lcd lock timeout. On the HomeLcd, tap on Menu icon. Select Settings > Power management.
- Use the Stamina mode and Low battery mode features.
- To activate the STAMINA mode: While you are in the Power management, tap on Point icon next to STAMINA mode, then tap Activate.
• Turn down your device volume with the volume keys.
• Close any apps or features when you are done using it so they will not continuously running in the background.
• Turn off the network connection if you are out of range so that your device will stop searching for a network signal. To turn off the network go to Settings and turn off the Bluetooth and Wi-Fi.
• You should use the latest version of the software update. Software updates improves some features and fixes some bugs on the previous software version.
• Adjust your brightness level to low.
• Turn off the camera flash.
• If you have any live wallpaper, Disable it.
• Set the synchronization application to manual. You can also choose the automatic, but increase the synchronization intervals.
• If you want to listen to music, use the Sony original hands free device. It demand less battery power than your devices own loudspeakers.
Wouldnt it be nice if youre phone automatically plays your song list right when you step in your car? Or what about letting you show your whole day agenda the moment you arrive at your work table between 8-9am? These are just examples on how Sony Xperia Z2 Tablets Smart Connect app works. With this app, you can set an event to happen on your device at certain times or what will happen when you connect/disconnect accessories like headset or charger. Hereshow to use it.
1. On your devices home Lcd, tap on Menu icon
2. Look for Smart Connect and tap on it.
3. If its your first time opening the said app, tap on OK to close the introduction Lcd.
4. Go to Events tab and tap on the plus (+) icon.
5. If you are creating an event for the first time, tap OK again to close the introduction Lcd.
6. Add conditions under which you want to trigger the event. A condition could be the connection with an accessory, or a specific time interval, or both.
7. Tap Right Arrow icon to continue.
8. Add what you want to happen when you connect an accessory, and set other settings as desired.
9. Tap Right Arrow icon to continue.
10. Set an event name, then tap Finish.
Transferring files in Sony Xperia Z2 Tablet is now made easy by using the Media Transfer Mode. You can easily transfer files between your device and other MTP compatible devices such as computer, using a Wi-Fi connection. But before you can transfer files wirelessly, you will need to pair both devices.
Note: You will need a Wi-Fi enabled devices that supports Media transfer such as a computer running Microsoft, Windows Vista orWindows 7.
To pair your device with the computer:
- Check if the media transfer mode of your device is enabled. It is normally enabled by default.
- Using the USB cable, connect your device to a computer.
- On your computer, once the name of your device appear, click on Network Configuration and just follow the steps on how to pair the computer.
- After pairing, safely disconnect your device from your computer.
These steps will work only on Windows 7 OS and the computer is connected to the Wi-Fi Access point via network cable.
To connect paired devices wirelessly in Media Transfer Mode:
- First things first, check if the media transfer mode is enabled.
- On your Home Lcd, tap on the Menu icon.
- Select Settings > Xperia > USB connectivity.
- Then tap the paired device that you want to connect to under Trusted devices.
- Tap connect.
If you want to disconnect, just tap on the paired device and tap Disconnect.
If you want to remove the paired device, tap on the paired device you want to remove and select Forget.
How to Add a Shortcut on Sony Xperia Z2 Tablet HomeLcd
Just like a desktop, it also works best on any smartphones to add a shortcut on a homeLcd. This r somehow makes navigation, especially to important files/apps, more accessible. Its less hassle and less tapping. Sony Xperia Z2 Tablet definitely allows you to make your device experience stress-free by adding a shortcut to important apps on your homeLcd. Heres how to do it.
1. On your devices homeLcd, touch and hold and empty area until the device vibrates.
2. After doing so, tap on Apps.
3. Then go to Shortcuts and select a shortcut.
4. Or another option, just go directly to the Application Lcd and touch and hold the application.
Adding Widgets on your HomeLcd will help you improve your productivity in using your Sony Xperia Z2 Tablet. If you dont know what widgets means, Widgets are small applications that you can directly use on your HomeLcd. These will serve as your shortcut icon so will no longer need to access your Menu.
Follow these steps on how to add widgets on your HomeLcd.
- Tap and hold an empty area on your Home Lcd until your device vibrates.
- There should an option appear, tap on Widgets.
- Select the widget and tap on it you want to add.
- There are some widgets that are resizeable, you can expand them to view the content more on your HomeLcd.
How to resize a Widget:
- Tap and hold the widget you want to resize until it magnifies and the device vibrates. You can tell if the widget is resizeable if the highlighted frame and resizing dots appear.
- You just need to Drag the dots for your preferred size.
- Then tap anywhere on the HomeLcd to confirm the new size of the widget.
How to Change Time & Date on Sony Xperia Z2 Tablet
In some devices you can only change the Timezone and not the specific time and date. But in Sony Xperia Z2 Tablet, you have an option whether to set the time in automatic or to manually set the time.
Follow these steps on how to change the time and date on your device:
To manually set the date:
- On your Home Lcd, tap the Menu icon.
- Select Settings, then tap Date & Time.
- You need to uncheck the Automatic date & time. If it is set to automatic.
- Then tap on Set date, and adjust the date by scrolling up and down.
- To confirm the changes, tap Done.
To manually set the time:
- On your Home Lcd, tap the Menu icon.
- Select Settings, then tap Date & Time.
- You need to uncheck the Automatic date & time. If it is set to automatic.
- Then tap on Set time, and adjust the time by scrolling up and down.
- To confirm the changes, tap Done.
If you want to change the timezone:
- On your Home Lcd, tap the Menu icon.
- Select Settings, then tap Date & Time.
- You need to uncheck the Automatic date & time. If it is set to automatic.
- Then tap on Select time zone.
- Find your preferred time zone in the option.
Duplicate contacts usually happens when you import your old contacts to your new device or when you synchronize your contacts with the other account. On your Sony Xperia Z2 Tablet, you can avoid dupicate contacts and instead link these two to create a single entry. If you happen to link two contacts by mistake, you can separate them again. Heres how you can link two contacts.
1. On your devices homeLcd, tap on
.2. Tap on
and tap the contact you want to link with another contact.3. Press on
and tap Link contact.4. And tap the contact whose information you want to be linked with the first one. Tap OK to confirm. The first contact no longer appears on your contact list but is merged with the second contact.
Now if you mistakenly linked two contacts
on your homeLcd and then tap on.2. Then tap on the linked contact you want to edit.
3. And tap on
. Tap on Unlink contact on the list and tap on OK to confirm.How to Transfer Contacts from Sim Card or Memory Card to Sony Xperia Z2 Tablet
Contacts is very important for everyone of us. We cant connect to our friends without a contact number. If you have a new phone, saving contacts on the phone one by one is so hassle. But if you have save your contacts on a Sim Card or Memory Card, then you can transfer your contacts from your SIM Card or Memory Card to your Sony Xperia Z2 Tablet.
How to transfer contacts from a SIM card to your Xperia Z2 Tablet:
- On your devices homeLcd, tap on the Menu icon .
- Then tap on the Person icon or Contacts.
- Press the Three Vertical Dots, and select Import contacts > SIM card.
- If you have set up a synchronization account, then you can choose to add the SIM card contacts under that account. Or you may choose to only use the contacts on your device.
- If you want to import all the contacts, tap Import all.
- If you want to select which contact to transfer, you just need to find and tap on the contact.
How to transfer contacts from a memory card to your Xperia Z2 Tablet:
- On your devices homeLcd, tap on the Menu icon .
- Then tap on the Person icon or Contacts.
- Press the Three Vertical Dots, and select Import contacts > SD card.
- Choose the option you preferred if you have set up a synchronization account. Whether to add the imported contacts under that account or on your device.
- If you have more than one vCard file on the SD card, there should be a list appear on the different batches of contacts. Just select the batch you want to import.
How to Import Contacts From Old Phone to New Phone (on Sony, iPhone, Samsung, HTC and Nokia)
Contacts is very important for everyone of us. We cant connect to our friends without a contact number. If you have a new phone, saving contacts on the phone one by one is so hassle. But now, theres an easy way how to transfer or import your contacts from your old phone to your new phone.
Use your PC to transfer contacts to your new phone. This process is applicable in several phone brands, including iPhone, Samsung, HTC and Nokia.
You just need an Internet Connection on your PC, your old and new phone and their own USB cable.
If you are not prompted with a pop-up window to install the PC Companion, you can also download the PC Companion here.
How to Screen Mirror Sony Xperia Z2 Tablet to Show the Screen on a TV
The Screen Mirroring will allow you to show the Lcd of your device on a TV or other large display without using a cable connections. It uses the Wi-Fi Direct technology that create a wireless connection between two devices. You can also use this feature to listen to music from your phone via the TVs speakers.
How to mirror the Lcd of your tablet on a TV:
1. First you need to turn on the Lcd mirroring function on your TV. Just follow the instructions in the User Guide of your TV.
2. From your Home Lcd, tap on the Menu icon
3. Select on Settings, and tap Xperia™.
4. Choose Screen mirroring.
5. Tap to turn on the Screen mirroring and select a device.
Note: The TV that you want to connect with must support Lcd mirroring for the above described functionality to work. If it does not support, then you can try the Throw feature. Go to Settings > Throw feature.
How to Activate Camera App and Play Tracks on a LockLcd on Sony Xperia Z2 Tablet
LockLcds dont normally allow users to launch any apps or even take photos. We still need to unlock our Lcds to use certain apps on our handset. But with Sony Xperia Z2 Tablet, you can take photos, record videos and play tracks without unlocking the Lcd. Heres how you can enjoy this feature on your Sony Xperia Z2 Tablet.
To take a photo on a lockLcd
1. Activate first your Lcd by briefly pressing the power key
2. Now activ the camera app by dragging the camera icon to the left across the Lcd.
3. And tap to take photos or record videos without unlocking your Lcd.
To play an audio on a lockLcd
1. Activate first your Lcd by briefly pressing the power key.
2. Now to display the music player controls, drag to the right across the Lcd.
3. And tap to play a track on a lockLcd.
To pause an audio track from the lockLcd
1. Activate first your Lcd by briefly pressing the power key.
2. When the music player controls appear, tap to pause the track.
To change the currently playing audio track on a lockLcd
1. Activate first your Lcd by briefly pressing the power key.
2. Then tap or
or when the music player controls appear.
How to Share Contacts Using NFC on Sony Xperia Z2 Tablet
How to Turn on Mobile Bravia Engine on Sony Xperia Z2 Tablet
How to Hard Reset Sony Xperia Z2 Tablet Using Buttons
We have our own reasons why we hard reset our device. Maybe we want to delete all the files and restore the device to its original state. It could also be the device may be malfunctioning or so slow and it needs to be reset.
Restoring the default settings or factory reset your Sony Xperia Z2 Tablet will delete all your existing files. It is recommended to backup your important files on your computer before attempting to reset your device.
1. If your phone is turned off, just press and hold the Volume Up and Volume Down buttons.
2. Then press and release the Power button (just keep on holding the volume buttons). There should a menu will appear on your phone.
3. Press the Volume down button to navigate to the Recovery option. Press the Volume Up to select (if that doesnt work, use the Power button to select).
4. An Android logo will appear. Press the Volume Down and Volume Up button together and a recovery menu should appear. Use the Volume buttons to move to the Wipe data/Factory reset option and then press Power to select.
5. Use the Volume Down key to choose Yes and press the Power button again to select.
Use your PC to transfer contacts to your new phone. This process is applicable in several phone brands, including iPhone, Samsung, HTC and Nokia.
You just need an Internet Connection on your PC, your old and new phone and their own USB cable.
Then you need to install the PC Companion program. This is a free application and the installation files are already saved on your new phone. This program can also be used in updating your phone software.
Please note that if you are using the Microsoft Windows 7 operating system on your PC, make sure that the AutoPlay setting is enabled.
To check your settings:
Click Start > Control Panel, then type "autoplay" on the search box. Click the AutoPlay, and mark the check box Use AutoPlay for all media and devices.
Installing the PC Companion:
Installing the PC Companion:
- Turn on your new Phone and connect it to your PC.
- On your new Phone, tap "Install" to install PC Companion on the PC.
- On your computer, if a pop-up window that appears notifies you about available PC Software, select Run Startme.exe.
- Then click Install to start the installation and then follow the instructions to complete the installation.
If you are not prompted with a pop-up window to install the PC Companion, you can also download the PC Companion here.
Transferring your contacts to your new phone:
- Make sure that PC Companion is installed on your PC.
- Open the PC Companion application on your PC.
- Then click Contacts Setup and follow the instructions to transfer your contacts.
How to Screen Mirror Sony Xperia Z2 Tablet to Show the Screen on a TV
The Screen Mirroring will allow you to show the Lcd of your device on a TV or other large display without using a cable connections. It uses the Wi-Fi Direct technology that create a wireless connection between two devices. You can also use this feature to listen to music from your phone via the TVs speakers.
How to mirror the Lcd of your tablet on a TV:
1. First you need to turn on the Lcd mirroring function on your TV. Just follow the instructions in the User Guide of your TV.
2. From your Home Lcd, tap on the Menu icon
3. Select on Settings, and tap Xperia™.
4. Choose Screen mirroring.
5. Tap to turn on the Screen mirroring and select a device.
Note: The TV that you want to connect with must support Lcd mirroring for the above described functionality to work. If it does not support, then you can try the Throw feature. Go to Settings > Throw feature.
How to Activate Camera App and Play Tracks on a LockLcd on Sony Xperia Z2 Tablet
LockLcds dont normally allow users to launch any apps or even take photos. We still need to unlock our Lcds to use certain apps on our handset. But with Sony Xperia Z2 Tablet, you can take photos, record videos and play tracks without unlocking the Lcd. Heres how you can enjoy this feature on your Sony Xperia Z2 Tablet.
To take a photo on a lockLcd
1. Activate first your Lcd by briefly pressing the power key
2. Now activ the camera app
by dragging the camera icon to the left across the Lcd.3. And tap
to take photos or record videos without unlocking your Lcd.To play an audio on a lockLcd
1. Activate first your Lcd by briefly pressing the power key
.2. Now to display the music player controls, drag
to the right across the Lcd.3. And tap
to play a track on a lockLcd.To pause an audio track from the lockLcd
1. Activate first your Lcd by briefly pressing the power key
.2. When the music player controls appear, tap
to pause the track.To change the currently playing audio track on a lockLcd
1. Activate first your Lcd by briefly pressing the power key
.2. Then tap
orwhen the music player controls appear.How to Share Contacts Using NFC on Sony Xperia Z2 Tablet
NFC feature is a must-have for any smartphones these days. Near-field communication or NFC works similarly like bluetooth. By touching your NFC-enabled phones against each other, you can then share contacts, music and photos. Well, heres how you can easily share contacts on Sony Xperia Z2 Tablet uisng NFC feature.
1. On your device, enable content sharing in Settings.
2. Then go to Wireless and Networks.
3 And choose on More menu.
When the phone vibrates, tap the onLcd message that says "touch to beam".
Mobile Bravia Engine is a pre-installed technology on Sony Xperia Z2 Tablet which allows you to view photos and videos in a clearer, sharper and more natural way. This technology might consume more battery but its worth it when you use it to view images in a nicer way. Heres how you can turn on Mobile Bravia Engine on Sony Xperia Z2 Tablet.
1. On your devices homeLcd, tap .
.
.2. Then find and tap Settings.
3. Go to Display.
4. And mark the Mobile BRAVIA Engine 2 checkbox if its not marked.
Now youre ready to view those captured moments in a clearer, sharper and more natural way.
Adding a location to those photos somehow adds relevance and it gives you that flashback of memories when you view those nicely captured moments. Well, this feature is not new any longer since its been there online and you often use them on photo-filtered websites. But with Sony Xperia Z2 Tablet, you can now add geotags on your photos right on your handset. Heres how you can add geotag on your photos.
1. Open your photo gallery on your device.
2. When youre viewing a photo, just tap the Lcd and the toolbars will display.
3. Now tapto open the map Lcd.
4. Find and tap the desired location to put the map on the photo.
5. To adjust the location of the photo, just tap the location on the map to where you want to move the photo.
6. Tap OK when youre done and to save the geotag. You can then return to the photo viewer Lcd.
1. Open your photo gallery on your device.
2. When youre viewing a photo, just tap the Lcd and the toolbars will display.
3. Now tap
to open the map Lcd.4. Find and tap the desired location to put the map on the photo.
5. To adjust the location of the photo, just tap the location on the map to where you want to move the photo.
6. Tap OK when youre done and to save the geotag. You can then return to the photo viewer Lcd.
How to Hard Reset Sony Xperia Z2 Tablet Using Buttons
We have our own reasons why we hard reset our device. Maybe we want to delete all the files and restore the device to its original state. It could also be the device may be malfunctioning or so slow and it needs to be reset.
Restoring the default settings or factory reset your Sony Xperia Z2 Tablet will delete all your existing files. It is recommended to backup your important files on your computer before attempting to reset your device.
1. If your phone is turned off, just press and hold the Volume Up and Volume Down buttons.
2. Then press and release the Power button (just keep on holding the volume buttons). There should a menu will appear on your phone.
3. Press the Volume down button to navigate to the Recovery option. Press the Volume Up to select (if that doesnt work, use the Power button to select).
4. An Android logo will appear. Press the Volume Down and Volume Up button together and a recovery menu should appear. Use the Volume buttons to move to the Wipe data/Factory reset option and then press Power to select.
5. Use the Volume Down key to choose Yes and press the Power button again to select.
Subscribe to:
Posts (Atom)