Wednesday, October 29, 2014
Explore »
home»
a
»
Camtasia
»
in
»
Of
»
portion
»
Speed
»
studio
»
up
»
videoclip
»
Speed up a portion of a videoclip in Camtasia Studio
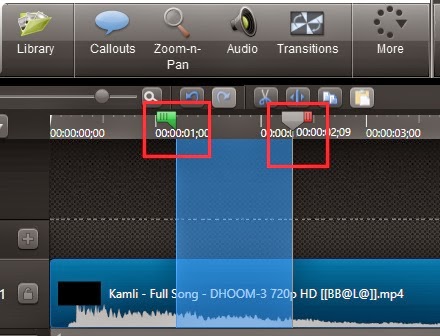
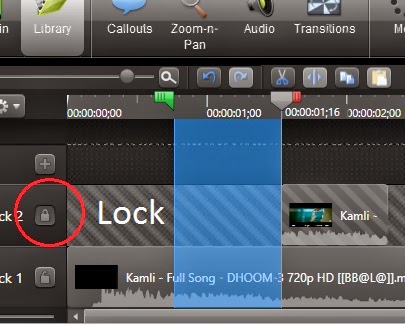
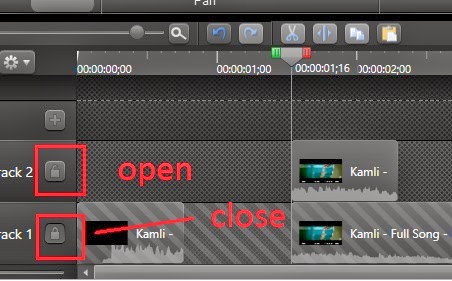
10) Now drag the selector to select the clip, to which we will apply the speed, make sure that the Lock is closedSpeed up a portion of a videoclip in Camtasia Studio
This tutorial is about Techsmith Camtasia Studio, probably the best software to edit tutorial videos now a days. It is very user friendly and easy to use software. Camtasia Studio 8.1.2 comes out with some great features, with the help of those we can actually create tutorial videos like the professionals.
In this discussion I shall be sharing the idea of clip speed, how can we speed up a particular portion of a video or how can we slow down a portion of a video. To follow this tutorial you need to pre install Camtasia Studio, it will be better if you install the version 8.1.2. Secondly you need a video to edit. So without pulling more this discussion, I am going to write the necessary steps with some screenshots, which will help you to understand better.
Follow the following steps
1) Run the Camtasia Studio, after installation.
2) Now click on Import media to insert the video
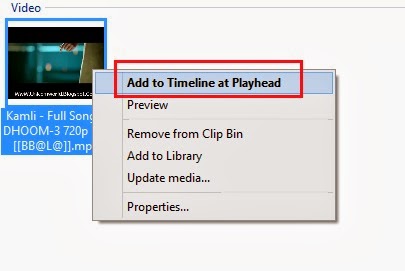
3) Now Right Click on the Video and click on Add to Timeline at Playhead
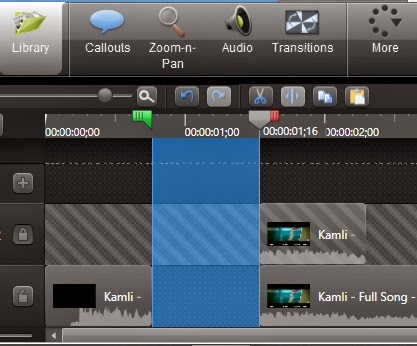
 4) Now select the portion of the video, which is to be speed up. (Take the help of the following screenshot)
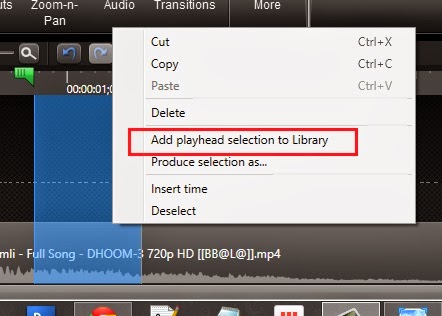
5) Now Right click on that portion and click on Add playhead section to Library as shown in the screenshot
 6) From the Library add the clip to the timeline, after adding the clip the timeline will be like
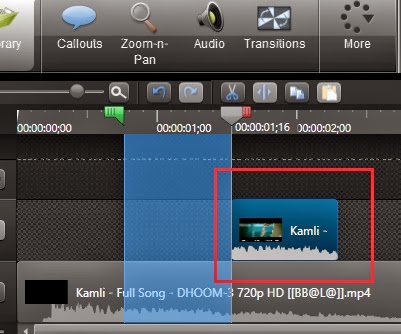 7) After that lock the recently added clip by clicking the open lock as shown in the following screenshot
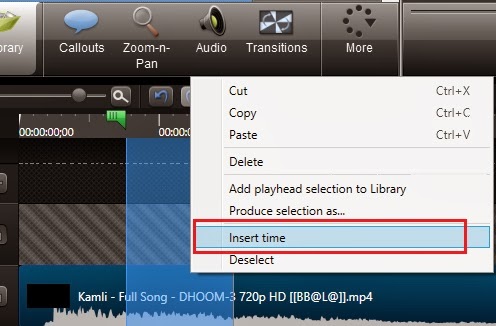
 8) Now Right Click on the selected (blue coloured) video portion and click on Insert time, as shown in the screenshot
9) Now you will get a timeline as shown in the following screenshotIn this discussion I shall be sharing the idea of clip speed, how can we speed up a particular portion of a video or how can we slow down a portion of a video. To follow this tutorial you need to pre install Camtasia Studio, it will be better if you install the version 8.1.2. Secondly you need a video to edit. So without pulling more this discussion, I am going to write the necessary steps with some screenshots, which will help you to understand better.
Follow the following steps
1) Run the Camtasia Studio, after installation.
2) Now click on Import media to insert the video
3) Now Right Click on the Video and click on Add to Timeline at Playhead
5) Now Right click on that portion and click on Add playhead section to Library as shown in the screenshot
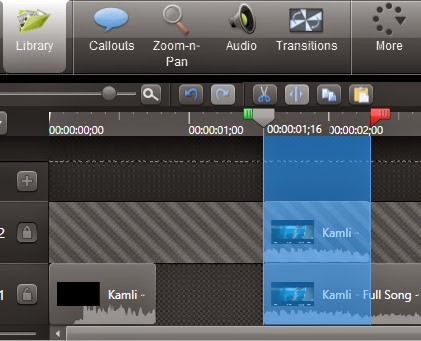
11) Now Right Click on that selected portion and click on Cut


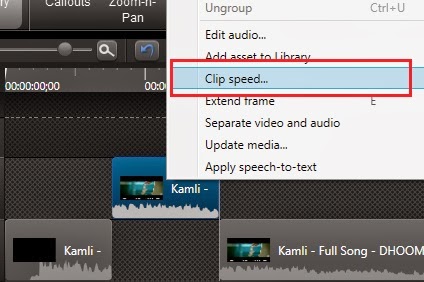
14) Now Right Click on the Clip and click on Clip speed, set the value, by default it is 100, if you want to speed up the clip increase the value and vice versa.
15) Finally select both the clips by pressing the Ctrl Key on the keyboard, and make them a Group. At last produce the video.
Carefully follow the above steps, if you get any problem, you can contact us. Thanks
Subscribe to:
Post Comments (Atom)
No comments:
Post a Comment